How to Change an ATV Chain and Sprocket
Feb 4th 2019
How to Change an ATV Chain and Sprocket

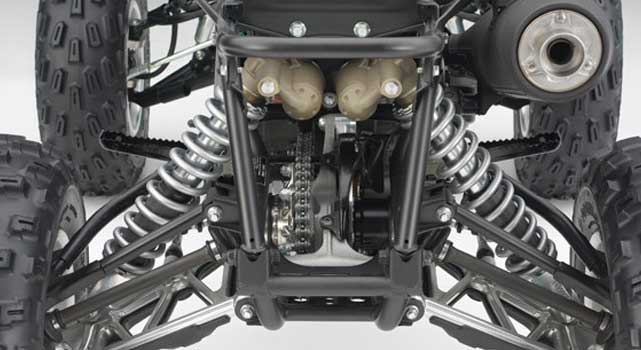
ATVs marry the rugged, trail-climbing capabilities of an off-road truck with the compact and lightweight form of a motorcycle. As such, ATVs incorporate a hybrid of car/truck and motorcycle engineering. The first ATVs were built from motorcycles and share many components such as engines, brakes, and suspensions. Some ATVs feature a driveshaft and an enclosed rear differential like what’s on pickup truck or a large SUV, but most continue to use a motorcycle-style chain-driven rear sprocket to turn the axle gears that transmit power to the rear wheels. The chain and sprocket is more efficient than a driveshaft with less power loss between the rear wheels and the engine, but it is noisier and generally requires more maintenance than a driveshaft and differential.

MAINTENANCE IS IMPORTANT
Unlike an enclosed differential where the rear gears are protected by the differential housing and bathed in oil, the rear sprocket and drive chain is left open and exposed to the elements during riding and even in storage. That’s why it is unwise to leave a motorcycle or ATV outdoors without at least a protective cover when not in use. Drive chains need to be periodically adjusted for rear tension and properly lubricated in order to eliminate snags. If left untreated, corrosion can form on the chain and cause it to stick, thus increasing wear and tear on the rear sprocket, the chain itself, and even the engine and transmission.
This quick step-by-step guide is for first-time owners or those who wish to save money by learning how to do this essential piece of ATV maintenance all by themselves. The job itself is quite involved, but it isn’t physically-demanding. Follow the procedures outlined here and you’ll do just fine.
TOOLS/PARTS YOU WILL NEED
- Socket wrench and socket set
- Torque wrench (check your ATV’s specific make and model for proper torque specs)
- Small C-clamp
- Flathead screwdriver
- Allen key set
- ATV stand/hydraulic ATV lift
- Master link pliers
- Snap ring pliers
- Chain breaker
- Chain press tool
- Chain rivet tool
- Chain alignment tool
- Chain roller
- Chain slider
- Sprocket tool
- T-handle wrenches
- Open ended wrenches
- X-ring chain and sprocket set
- Degreaser
- Medium-strength threadlocker
- Service manual
Yes, there’s a lot of stuff here in this list but all of it is necessary to do the job. Race Driven sells brand new, aftermarket ATV and motorcycle chains and sprockets as well as an assortment of important tools and accessories such as chain alignment tools, chain breakers, and master links.
STEP 1:
With your ATV lifted and properly secured by a stand or lift and the rear wheel removed (this is typically the left rear wheel), use your master link pliers to remove the retaining clip from the master link in the chain. Remove the chain.
STEP 2:
Use your snap ring pliers to remove the retaining clip. Remove the countershaft sprocket.
- On Honda ATVs, the countershaft sprocket is secured by a bolt and washers. On Yamaha ATVs, there is a large nut. There are two ways to break loose the retainer. You can either have someone hold down the rear brake or you can remove the chain, flatten the lock washer, and use your sprocket tool to lock the sprocket in place. This will make removal of the retaining bolt/nut easier.
Clean the countershaft area and install the new sprocket. Reinstall the retaining clip and be sure that it is seated all the way into the groove.
STEP 3:
Remove the sprocket bolts and nuts with an Allen head T-handle wrench and an open ended wrench. Spray some degreaser to clean the hub and wipe it down. Don’t allow the degreaser/melted grease to sit and dry; all you’ll be doing is redistributing the mess as opposed to cleaning it. Place the new sprocket onto the hub and secure it with the sprocket bolts and nuts.
- Use the medium-strength threadlocker to secure the bolts. Don’t use anything stronger than medium-strength. Not only is it unnecessary, it will make the next sprocket and chain service job all that much tougher when you have to break loose the sprocket bolts because the threadlocker is too strong.
- Tighten the bolts using a clockwise, star-shaped pattern. You’re going to want to hit every other bolt as to ensure that equal tension is applied. This is akin to taking off a wheel and tire. If the bolts are too tight or too loose on one side, the sprocket can warp or it can come off completely due to uneven and inadequate tightening.
- Use a torque wrench to complete the tightening sequence. Refer to your service manual for proper specifications.
STEP 4:
Inspect the chain slider and chain rollers. If they are cracked, worn, or in overall poor shape, you will need to replace these.
STEP 5:
Attach your new chain onto the sprocket. Thread the chain through and around the front sprocket and then slide it through the chain guide and back around the rear sprocket.
- Chain and sprocket kits are model-specific, but a perfect fit right out of the box is not always guaranteed.
- If the new chain is slightly shorter than to old one, use the chain adjusters. Loosen the jam nut on each adjuster and turn the adjuster bolt to slide the axle forward. Be sure that both sides are adjusted equally. You can use the marks in your axle blocks for guidance. Once the axle has been slid forward, the chain is ready for the master link.
- If the new chain is longer than the old one, you can determine the proper length by measuring it alongside the old chain. Use the chain breaker to cut off the excess. Reinstall the new chain to check fitment.
STEP 6:
Install the master link onto the chain.
- For O-ring style chains (as found on Honda ATVs), install an O-ring on each pin before installing the master link.
- The chain press tool makes installation much easier. Line up the chain press tool on the chain and apply pressure onto the two outer bolts. Tighten the center bolt to press the plate onto the link pins. DO NOT OVERTIGHTEN! Only use enough pressure to allow the clip to be able to seat, otherwise you will damage the O-rings. Remove the chain press tool once you are finished.
STEP 7:
Install the master link clip facing opposite of the rotational direction. Use the master link pliers to finish installing the link clip.
STEP 8:
A chain that is too tight or too loose can have a negative impact on performance and driveability. This can also lead to increased and excessive wear on not just the fresh new chain and sprocket you’ve just installed, but also on the engine and other drivetrain components. Measure the amount of slack in the chain and adjust according the specifications in your service manual. Use the chain adjusters to change the distance from the swingarm. Be sure that it is equal on both sides.
STEP 9:
Reinstall the wheel and tire. Torque down to the proper specifications per your service manual.
Congratulations! You’ve changed out the sprocket and chain on your ATV all by yourself!


